

YOUR CART IS EMPTY
Go to cart
A windshield installation is only as strong as the pinchweld underneath it. If the old urethane is trimmed wrong, the surface is dirty, or the primer is skipped, the bond fails no matter how good the new adhesive is. This guide walks through the tools professional auto glass technicians use to strip old urethane, prep the pinchweld correctly, and lay a clean new bead for reinstallation.
The pinchweld is the metal flange around the glass opening where urethane bonds the windshield to the vehicle. That bond does more than hold the glass in place. It contributes to roof crush resistance, correct airbag deployment, and the structural integrity of the cabin in a rollover.
Skip the prep or do it poorly and the problems show up fast. A contaminated or uneven bonding surface leads to water leaks, wind noise at highway speed, and adhesion failure that can let the glass shift or pop out. Scraping down to bare metal and leaving it exposed invites rust, which spreads under the new bead and destroys the seal from the inside out.
Proper prep protects the customer and protects your reputation. It is the part of the job that separates a technician who does it right from one whose callbacks eat the profit.
The best tool for removing old urethane from a pinch weld is the one that gives you the most control over depth. You are not trying to strip the flange bare. You are trimming the existing bead down to a thin, uniform layer so the new urethane bonds to old urethane rather than paint. Tools that let you set and hold a precise cutting depth are what professionals reach for first.
Manual scrapers put the depth of every pass in your hand. There is no motor speed to manage, no blade chattering, and no heat building up against the paint. You feel the resistance of the urethane and adjust the angle in real time, which is exactly what you want when a slip could gouge the metal or the finish.
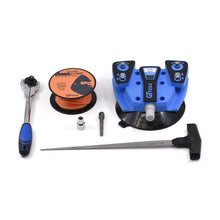
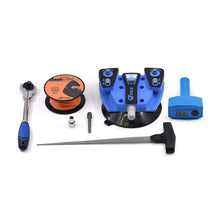
The GT Tools RazorScraper™ System is built for this work. The handle carries a durable, hardened steel blade that trims old urethane cleanly and re-sharpens when it dulls, so the tool stays useful job after job. When a blade finally wears out, the RazorScraper™ Windshield Urethane Scraper Blades drop in as replacements, cut from surgically sharp stainless steel and sold in 10-pack sets across multiple sizes.
A tip worth following from auto glass trainer Bob Beranek: use blades beveled on one side only. As Beranek explains, single-bevel blades let you control the depth of the cut by raising and lowering the angle of the blade, something a double-beveled blade cannot do as reliably [1]. That control is the whole point of manual prep.
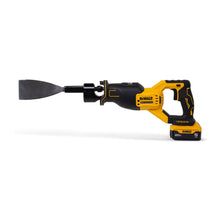
Other removal methods exist, and it helps to know where they fit. Oscillating power tools chew through urethane quickly but demand a steady hand to avoid biting into paint or metal. Induction heaters like Induction Innovations' Glass Blaster take a flameless, blade-free approach, using heat to release the bond. The company claims the Glass Blaster removes windshields in 12 minutes or less and side glass in 3 minutes or less, with no cable or wire and a Cold Shield Thermal Gel accessory to protect paint.
Those tools have their place, especially on stubborn or badly rusted openings. For everyday pinchweld trimming, though, manual scrapers keep you clear of two real risks: heat damage to the paint and accidental cuts into the frame. A blade you can feel and steer is hard to beat when precision is the job.
Here is the workflow professional technicians follow once the old glass is out. The right pinchweld prep tools for windshield installation make each step faster and cleaner.
Trim the old urethane. Leave a thin, uniform bead of the original urethane, roughly 1 to 2 mm, on the flange. This is what vehicle manufacturers recommend, and it gives the new bead a proven surface to bond to. Use a sharp blade with steady, even pressure. As the WRD Pro Scraper demonstration shows, you run the blade along the glue line with a nice even pressure rather than pulling hard, because pulling too hard breaks the glue away from the metal instead of trimming it [2].
Clean and remove debris. Clear the channel of urethane shavings, dust, and any rust flakes. The goal is a pure bonding surface. Get the pinchweld as clean as possible anywhere near the glue line before anything else touches it.
Inspect for damage. Look closely for scratches, bare metal, or corrosion. Any of these will compromise the new seal if left alone. Catching a rust spot now is far cheaper than a comeback later.
Prime the surface. Apply the correct primer wherever the trim exposed bare metal or scratched the paint. Primer promotes adhesion and blocks the corrosion that quietly kills a seal from underneath. Follow the flash time on the product.
For the full range of tools that support this process, from scrapers to gasket seating, the Pinch Weld and Gasket Tools collection covers the made-in-USA hand tools that keep the workflow moving.
Once the pinchweld is clean and primed, the new bead has to go down straight and consistent. That comes down to your caulking gun. The two choices that matter for auto glass are high-thrust manual guns and battery-powered cordless guns.
Auto glass urethanes are thick, and they get thicker in cold weather. A high-thrust-ratio manual gun gives you the leverage to push that material out in a smooth, controlled line. Manual guns also give you the most direct feel for flow, which some technicians prefer for detail work around corners.
The Mechanical Advantage Caulking Gun 26 to 1 is built for this. Its 26-to-1 lever ratio handles high-viscosity urethane even in cold weather, and the patented mechanism compensates for wear on the push rod so the gun keeps performing as it ages. It works with standard 10 oz cartridges and is made to hold up to years of shop use. If you want to buy an industrial caulking gun for car window installation that will not quit on you, a high-thrust manual gun like this is the workhorse choice. Competitors sell to the same spec: the VWD Professional 26:1 Caulk Gun uses the same 26:1 lever ratio for fatigue-free flow in cold conditions, listing at $29.95 [3].
A cordless caulking gun for mobile windshield repair removes the two things that slow a field tech down: cords and air hoses. There is no compressor to haul, no outlet to find, and no line to trip over. You get consistent bead speed at the press of a trigger, less hand fatigue over a full day of installs, and the freedom to work anywhere the vehicle sits.
When comparing guns, check these specs before you buy:
Thrust ratio. This measures how much pushing force the gun generates. A higher ratio, like 26:1, moves thick urethane with less hand effort, which matters most in cold weather. Albion's bulk lineup spans manual, air-powered, and cordless models across a range of drive ratios [5].
Build quality. Look for durable materials that survive being dropped, stacked, and used daily. A gun that flexes under load wastes your effort on the tool instead of the bead.
Cartridge compatibility. Standard formats are 10 oz cartridges for manual guns and sausage packs for cordless and high-volume work. Match the gun to the urethane format your shop uses so you are not adapting on every job.
Pinchweld prep and urethane application reward tools that are durable, easy to control, and ready for real field conditions. That is where GT Tools focuses: manual scrapers that give you depth control down to the millimeter, high-thrust caulking guns that handle cold-weather urethane, and battery-compatible cordless options for mobile work. GT Tools products are also carried through authorized distributors, including US Auto Supply's Glass Technology lineup, so technicians can source them through the channels they already use [4].
Browse the full range of Caulking Guns and the complete Auto Glass Replacement catalog to build out a kit that covers removal through installation.
A safe, leak-free windshield comes down to two things: stripping and prepping the pinchweld correctly, then laying a clean bead with a gun you can trust. Get the tools right and the job is faster, the callbacks disappear, and the work holds up. For technicians who value durability, control, and reliability in the field, GT Tools is the supplier built around that standard.