

YOUR CART IS EMPTY
Go to cart
A fresh crack in your windshield rarely stays the same size for long. Temporary protection can limit contamination and lower the chance of further spreading, but it is not a permanent repair. If you want to know how to stop a windshield crack from spreading long enough to reach a technician, the practical answer is to control debris, temperature, and vibration while you arrange service. A crack that reaches an edge, blocks your view, or branches in several directions needs professional assessment, not a wait-and-see approach.
Act quickly and keep your steps simple. The goal is to protect the damage from anything that could make it grow before you get it looked at.
Park out of temperature extremes where you can, away from direct sun and hard freezing.
Gently clean and dry the glass around the crack.
Cover the damage with transparent adhesive or clear tape to keep debris out.
Arrange repair promptly rather than driving on the damage for weeks.
Dirt and water that work into a crack can interfere with a later repair and may contribute to spreading. Apply a temporary cover over the outside of the damage with light pressure. This is contamination control, not a structural fix. It matters because a technician has to remove debris, moisture, and dirt to get proper resin bonding [1], and a crack that has been sitting open on the highway for three weeks is harder to prepare.
Heat and cold make glass expand and contract, and that movement stresses the edges of a crack. GT Tools puts it directly: with temperature changes and vibration, minor chips can quickly spread.
Park in shade when you can, and avoid leaving the windshield to bake in full sun or sit in a hard freeze. Skip rough roads and heavy potholes on the way to service. Go easy on a blasting defroster aimed at cold glass, but never compromise the visibility you need to drive safely. If you must defrost to see, defrost. These handling steps lower risk; they do not guarantee the crack stays put.
Do not treat tape, glue, or polish as a permanent windshield repair. These measures only hold you over until a technician can assess the glass. Do not attempt any DIY intervention in the driver's critical viewing area, at the windshield edge, or on extensive, spidering damage. Damage in those spots affects structural strength or visibility, and it belongs with a professional.
This is the decision that matters most. Each option has a clear purpose and a clear limit, and no temporary measure will permanently stop a crack.
GT Tools' repairability guidance is specific: chips smaller than a quarter, or cracks less than three inches long that are not in the line of sight, are generally repairable. Cracks that reach the edges, affect visibility, or spider out in multiple directions call for replacement. You will see more generous numbers elsewhere online. Use the conservative figure as your working limit and let a technician make the call.
|
Option |
Best-fit damage |
Location considerations |
Likely outcome |
Next step |
|---|---|---|---|---|
|
Temporary protection (tape or clear cover) |
Any small crack awaiting service |
Not a solution for edge cracks or the driver's sight line; use only to get to service |
Slows debris entry; does not stop spreading permanently |
Book repair or replacement soon |
|
Professional chip or crack repair |
Chip smaller than a quarter, or a crack under three inches, shallow and single-direction |
Best outside the driver's field of view |
Resin bonds the damage and restores strength |
Have a technician confirm repairability |
|
Windshield replacement |
Long cracks, extensive or multi-directional damage, edge-reaching cracks |
Needed when damage affects visibility or structure |
New glass; may involve ADAS calibration |
Get a professional assessment |
Small, careful habits protect the glass in the days before your appointment. The theme is control: reduce stress, keep the area clean, and avoid quick fixes that backfire.
Avoid pressure and vibration where you can. Skip slamming doors and driving over potholes, and keep the car off rough roads until service. Sudden temperature swings are the other half of the problem, so park in shade, warm the cabin gradually in winter rather than blasting a cold windshield, and give the glass time to equalize.
Clean the area gently and with low pressure. A clean, dry crack gives a technician the best chance at a strong repair, since the damage has to be cleaned before resin bonding. Wipe lightly around the outside and let it dry. Do not push on the glass or try to force anything into the crack.
Do not drill the glass, create a stop hole, or use professional crack-stopping tools yourself. Those techniques belong to trained technicians who know how to isolate a crack without ruining the windshield. A well-meaning DIY drill can spread the very damage you are trying to contain. Treat any household glue or polish as a stopgap for debris control, not a repair.
A DIY kit may suit limited, accessible damage outside the driver's viewing area. Whether it fits depends on size, depth, position, contamination, and crack pattern, so assess the damage honestly before you commit.
Repair effectiveness depends on proper cleaning, resin selection, injection, curing, and finishing. Resin choice is not one-size-fits-all: low-viscosity resin is meant for tight, small, fast-spreading cracks, medium viscosity for general-purpose repairs, and high viscosity for large chips or deep cracks. Matching the resin to the damage is most of the job. Read your kit's instructions before you start, since curing procedures differ between products.
Call a professional in these cases:
The crack reaches an edge.
The damage sits in the driver's field of view.
The crack branches or spiders in multiple directions.
The damage is extensive.
You are unsure whether it can be repaired.
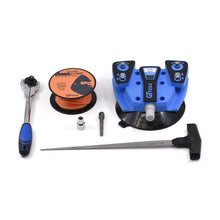
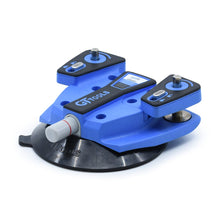
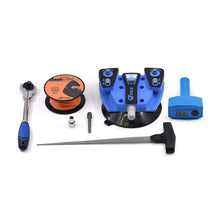
One thing worth knowing before you shop: the windshield repair kits on the GT Tools site are built for professional use, offering precision and durability for high-quality repairs. If you are curious what your technician will be working with, the windshield repair collection shows how the equipment is organized.
Professional repair follows a consistent sequence: inspection, cleaning, resin injection, curing, and polishing. Each stage supports the next.
The technician assesses the size, location, and depth of the damage first. This step decides whether repair is appropriate at all, or whether replacement is the safer call. GT Tools' expert guide walks through the criteria a professional applies before touching the glass.
Thorough cleaning of the damage sets up the injection stage. Debris, moisture, and dirt are removed so the resin bonds properly. Injected resin restores structural strength, curing hardens it, and polishing improves smoothness and visual clarity at the end. With LED systems like GT Tools' DarkCure™, the cure itself takes 15 to 30 seconds, so most of your appointment is inspection, preparation, and finishing rather than waiting.
Long cracks call for specialized handling, and this is where the gap between a consumer kit and a professional setup is widest.
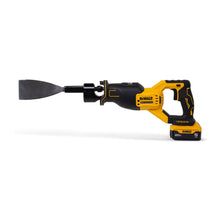
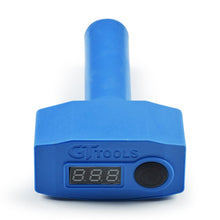
The Slide Hammer creates a small bullseye at the end of a long crack to isolate the damage and keep it from extending. It uses a spring-loaded snap shaft: pulled back and released, it transfers a measured amount of energy to a carbide tip to make a clean bullseye. It can also open tight bullseye breaks that are hard to fill.
Crack Jacks handle the long crack itself. Standard crack jacks are designed for the middle of the glass and are spaced three to five inches apart along the crack on the interior of the windshield, with the pressure point centered on the crack. They are sold singly or in three-packs.
Both are professional tool applications, not home steps. They exist because a technician needs to apply controlled, measured force at a specific point, which is exactly what a DIY approach cannot deliver.
Some damage moves past repair. Consider a replacement assessment for cracks that reach the edges, interfere with driver visibility, or spread in multiple directions, along with any damage that is not a suitable resin-repair candidate.
Calibration needs depend on the vehicle and the service performed, so ask the provider what your specific vehicle requires. Not every replacement requires calibration, and a repair does not erase all safety concerns. Temporary protection is only for getting you safely to that assessment, not for delaying needed service.
You can slow a crack with temporary protection and careful handling, but only a professional repair reliably locks it in place. On long cracks, technicians isolate the leading edge with a tool like a slide hammer, which creates a small bullseye at the crack's end to stop it extending. Home measures reduce risk; they do not guarantee the crack stays put.
A temporary fix, such as clear tape, keeps debris and moisture out of the crack until you reach service. A permanent repair cleans the damage, injects resin into it, and cures that resin to restore strength and clarity. The temporary step protects; the repair fixes.
No. Repair suits small, shallow, single-direction cracks outside the driver's sight line, generally chips under a quarter and cracks under three inches. Edge cracks, branching damage, and cracks in the driver's field of view usually point toward replacement. A technician confirms which category your damage falls into.
Not entirely. A sound repair seals the break, limits spreading, and improves clarity, but a repaired break can remain slightly visible. Set that expectation before the work rather than after.
Gently clean and dry the area, cover it with clear tape, and avoid heat, cold, and rough roads on the way in. Note when and how the damage happened, since that helps the technician judge severity. Leave the tape in place until they are ready to inspect the glass.