

YOUR CART IS EMPTY
Go to cart
A cracked windshield leaves you with three practical choices: protect the damage until you can act, attempt a limited DIY resin repair, or book a professional. This guide helps you decide quickly and safely, because not every crack is a good candidate for do-it-yourself work. Some damage affects your view or the glass structure and belongs with a trained technician. Read the snapshot first, then decide.
Before you touch a repair kit, take a moment to assess what you are dealing with. A fast, conservative decision now saves you from making a small problem worse.
GT Tools' guidance is specific: chips smaller than a quarter, or cracks less than three inches long that are not in the line of sight, are generally repairable. Cracks that reach the edges, affect visibility, or spider out in multiple directions call for replacement [1].
You will see other numbers online, some as generous as six inches. Treat the more conservative figure as your working limit, and remember that no single measurement is a safety rule on its own. Location, visibility, complexity, contamination, and your own uncertainty matter more than any exact inch count.
Stop and call a professional if any of these apply:
The damage sits in the driver's direct line of sight.
The crack reaches the edge of the windshield.
You see spidering, multiple branches, or a long or actively spreading crack.
Moisture, dirt, or debris is present and you cannot confidently remove it.
You feel any uncertainty about the damage depth, location, or safe next step.
For a fuller look at what is repairable and how professional repair works, see GT Tools' Expert Guide for Auto Professionals.
Use this table before you start any repair. Its job is to help you evaluate risk first.
|
Factor |
DIY resin kit may be reasonable |
Professional repair is safer |
Replacement / immediate assessment |
|---|---|---|---|
|
Crack location |
Away from the edge and driver's view |
Near critical areas or hard to reach |
Reaches the edge of the windshield |
|
Size and shape |
Chip smaller than a quarter, or a crack under three inches, simple shape |
Larger chips, or a crack that needs controlled handling |
Extensive damage or spidering in multiple directions |
|
Driver visibility |
Outside the direct line of sight |
Borderline, needs a closer look |
In the driver's line of sight |
|
Damage condition |
Fresh, clean, dry |
Older or slightly contaminated |
Cannot be confidently cleaned; do not proceed if unsure |
|
Tools and control required |
Basic single-injector kit, careful hands |
Controlled vacuum, pressure, and curing setup |
Full assessment, not a resin fix |
|
Likely finish |
Improved appearance, not invisible |
Cleaner, more consistent result |
New glass installed |
|
Safety risk |
Low, on clearly suitable damage |
Moderate, handled by a technician |
High; needs assessment |
A note on outcomes: visual improvement and structural restoration are different things. A resin repair seals the break and limits spreading. It does not return the glass to factory-new appearance or strength, and a repaired break can remain slightly visible.
Your first moves are about protection and cleanliness, not repair. Moisture and debris interfere with both resin bonding and your ability to assess the damage, so timing matters.
Cover or shelter the damaged area from rain, car washes, and road dirt until you can assess or repair it. Keep the spot dry and undisturbed. When you are ready to prepare, start with a completely dry windshield near room temperature so you do not trap water inside the repair. Debris, moisture, and dirt have to be removed for the resin to bond properly.
Caution: Do not drill the glass or improvise methods you saw somewhere online. If the crack is complex, contaminated, or spreading, stop and take the vehicle to a professional.
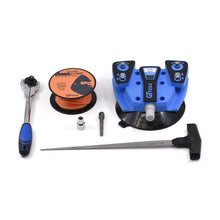
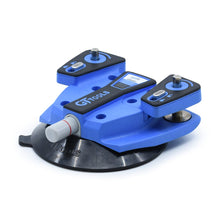
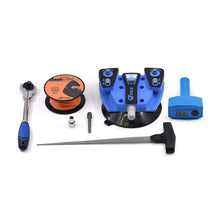
Worth stating plainly, because it decides what you should buy: the windshield repair kits on the GT Tools website are designed for professional use, offering precision and durability for high-quality repairs. They are built for technicians running repairs daily, not for a one-time driveway fix.
That distinction matters in both directions. If you are a vehicle owner with a single fresh chip, a professional system is more tool than the job needs. If you are a technician, mobile operator, or shop, the professional systems are the point:
The VANISH™ Professional Windshield Repair Kit, GT Tools' most automated repair platform.
The SuperStar™ SpeedLock™ Windshield Repair Kit, the vacuum-and-pressure workhorse.
The Crack Repair System for long cracks, which covers corner cracks through center field cracks and is compatible with any windshield repair system. It includes three Standard Crack Jacks, a 15cc Diamond Clear Pit Filler PF, a 15cc Diamond Clear Crack Resin CR, pit tape, and a needle cap.
Owning capable equipment is not the same as having a suitable repair situation. The deciding factors are the damage itself, controlled technique, and following the instructions exactly.
For any resin repair, think in terms of what each item does rather than a plain shopping list.
Inspection and cleaning supplies: glass cleaner, a microfiber cloth, and a pin or needle to lift loose particles.
Bridge and injector assembly: holds position over the break and controls where the resin goes. GT Tools groups these in its bridges and injectors collection.
Repair resin: fills the damaged area. Viscosity is matched to the break type and the temperature; see the windshield repair resins collection.
Curing source: a UV curing lamp that hardens the resin.
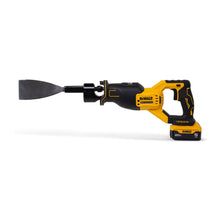
Finishing tool: a razor blade, used only as your kit directs, plus polishing to restore clarity.
The parts work as a sequence. The bridge and injector control resin placement, the resin fills the damage, and the curing light hardens it. Do not assume components from different systems work together unless the product page says so.
This is a map, not a substitute for the instructions in your kit's box. Work out of direct sunlight so the resin does not begin curing before you are ready.
Inspect the size, location, visibility impact, and condition of the damage.
Stop if the damage meets any professional-assessment condition from the snapshot above.
Clean and fully dry the repair area.
Set up the patch, bridge, or injector according to your kit's instructions.
Apply resin using the kit's specified pressure and vacuum sequence, watching for escaping air bubbles.
Cure the resin for the time your kit specifies.
Remove excess cured resin only as directed, then inspect the finished area.
Reassess visibility and crack stability. Seek professional help if the result is unclear, the damage keeps spreading, or your view is still affected.
Step 5 is where most DIY attempts go wrong. If air cannot leave the break, resin cannot fill it, and once the resin cures an unfilled leg stays unfilled.
Professional repair uses repeatable inspection, controlled resin delivery, consistent curing, and careful finishing. GT Tools describes the professional sequence as inspection, cleaning the area, resin injection, curing, and polishing, and notes that shop technicians use vacuum injection, pressure cycling, and LED curing to deliver strong, lasting results.
Speed is part of it. With LED systems like GT Tools' DarkCure™, full curing takes 15 to 30 seconds, which is what lets a technician work through repeatable, consistent repairs rather than waiting out a cure on every job.
The real value of professional equipment is manual control and repeatability across many damage types. For the full professional workflow, see the Expert Guide. For kits, resins, bridges, and supplies, see the Windshield Repair collection.
Repair and replacement solve different problems. Repair addresses localized damage with resin. Replacement is the right next step when damage is extensive, reaches critical areas, compromises visibility, or cannot be confidently repaired.
GT Tools identifies edge-reaching cracks, cracks that affect visibility, and cracks that spider out in multiple directions as replacement situations. Where the damage is genuinely suitable, repairing rather than replacing keeps the original factory seal intact and gets the vehicle back on the road sooner.
Do not lean on a size guideline alone. When location, visibility, edge involvement, contamination, or your own uncertainty raises the risk, treat that as the deciding signal.
Coverage rules vary widely, so verify the details with your insurer before you authorize any work. Deductibles, whether repair and replacement are treated differently, approved providers, and reimbursement requirements all depend on your specific policy.
Ask your insurer directly whether your policy covers repair, replacement, mobile service, and any calibration-related work if it applies, and whether filing a claim affects your deductible. None of these is universally covered, so confirm your own terms first.
Sometimes. GT Tools' repairable range is chips smaller than a quarter, or cracks under three inches that are not in the line of sight. Stop for visibility issues, edge damage, spreading, complex cracking, contamination, or any uncertainty. A consumer resin kit can limit spreading and improve appearance; it is not equivalent to a professional repair.
When the crack reaches the edges, affects visibility, or spiders out in multiple directions. Those are the three replacement signals GT Tools names, and any one of them is enough on its own.
They are designed for professional use, offering precision and durability for high-quality repairs. If you are a technician, mobile operator, or shop, that is exactly what you want. If you are a vehicle owner with one fresh chip, it is more system than the job requires.
In sequence: the bridge and injector handle alignment and controlled application, the resin fills the damage, the curing light hardens it, and polishing restores surface clarity. Match components within one system rather than mixing across kits.
With LED systems like DarkCure™, full curing takes 15 to 30 seconds. Total job time depends on preparation, inspection, weather, and the damage itself, so treat the cure figure as one step rather than the whole repair.
It depends on your policy. Check the repair and replacement terms, your deductible, any approved-provider requirements, and the claim process with your insurer before you commit to work.
Protect the damage first, keeping it dry and clean until you can act. Use a resin kit only when the damage is clearly suitable and manageable, as described in the snapshot and comparison table above. When visibility, crack location, complexity, contamination, or uncertainty raises the risk, get a professional assessment instead. For the full professional-repair details, see the Expert Guide for Auto Professionals.