

YOUR CART IS EMPTY
Go to cart
Hard water spots build up when mineral-rich water dries on glass, and the fix depends on how far that buildup has gone. This guide works in staged steps, from a gentle test toward a dedicated glass-safe remover, so you match the treatment to the actual condition of the surface. The same logic applies to a shower door, a window, or a windshield, with adjustments for each.
Hard water spots are mineral deposits left behind when water evaporates and leaves its dissolved calcium, magnesium, and other minerals on the glass. Over time those minerals bond to the surface and form a visible film.
Common sources include sprinkler overspray drying on windows and car bodies, shower water splashing onto enclosure glass, and rainwater runoff carrying minerals down a windshield. Each deposits fresh minerals every time the water dries.
Left in place, deposits can progress. What starts as removable surface residue can, with repeated exposure and time, bond hard enough to etch into the glass itself. There is no universal timeframe, since it depends on water chemistry, exposure, and cleaning frequency. Acting on fresh spotting is far easier than dealing with an established layer.
Visual cues for mineral deposits:
A white or chalky film across the surface
Circular rings or drip marks where droplets dried
Cloudy or hazy spotting that dulls clarity
Rough or gritty texture you can feel with a clean fingertip
Physical glass damage looks and feels different. If a mark stays cloudy or pitted after a thorough cleaning, or a line catches your fingernail, you are likely dealing with etching or a scratch rather than surface residue.
Diagnose the surface before using any product. Mineral deposits sit on top of the glass. Scratches are physical marks cut into it. Etching shows as persistent cloudiness or pitting that stays after the glass is clean and dry.
Wash and dry the glass, then inspect under angled light so the light rakes across the surface. Deposits reflect as a film or spotting you can often lift with cleaning. Scratches and etching stay fixed in the glass.
The fingernail test is the practical dividing line. The GT Tools® Glass Polishing Kit is designed for light surface blemishes, water spots, and fine scratches that do not catch your fingernail. A mark that catches your nail is deeper than surface work should address.
One stop rule throughout: do not keep escalating pressure or abrasiveness when you see haze, pits, coating damage, cracks, or you are unsure of the glass type. Escalating on damaged or coated glass makes the problem worse.
Escalate only after you have cleaned the glass and tested a gentler method. Jumping straight to abrasives risks damaging glass that a mild approach would have cleared.
|
Condition |
Typical appearance |
Appropriate treatment |
When to stop |
|---|---|---|---|
|
Light mineral deposits |
Thin white or chalky film, light rings, faint spotting that wipes partly clear |
Gentle wash, then a tested vinegar-and-distilled-water method on confirmed compatible, uncoated glass |
Stop if a gentle test leaves haze or the result does not improve |
|
Heavy or stubborn deposits |
Thick, cloudy buildup or hardened spotting that resists gentle cleaning |
A glass-safe dedicated water spot remover, used exactly as labeled, worked in small sections |
Stop if cloudiness or pitting stays after deposits lift |
|
Etching or pitting |
Cloudiness or pits remaining after the glass is clean and dry; marks that catch a fingernail |
Stop DIY cleaning; assess for professional restoration or replacement |
Stop immediately; do not increase pressure or switch to harsh abrasives |
These steps apply to shower glass, household windows, and vehicle glass. Follow the specific product label and any vehicle or glass manufacturer guidance, since compatibility varies by surface.
Before you start:
Test a small, inconspicuous area first and check the result before treating the whole surface.
Protect paint, rubber, trim, seals, and surrounding finishes from cleaners and pads.
Avoid abrasive or acidic products not rated for glass.
Do not use household remedies blindly on coated, tinted, laminated, treated, or specialty glass.
Begin with a gentle wash to remove dirt, soap scum, and grime before you assess the mineral stain. Loose soil hides the true condition of the deposits and can drag across the surface during treatment. Warm water and dish soap, followed by rinsing and drying, works for shower and household glass; the soap lifts oils and film so the mineral marks stand out on their own.
Dry the glass completely before you inspect. Drying separates the remaining mineral marks from loose soil or water droplets, so you judge the deposit itself rather than a wet surface.
Vinegar is an optional, limited first attempt for light deposits on confirmed compatible, uncoated glass. A 50/50 mix of vinegar and distilled water is a common approach [1]. Apply, scrub gently with a microfiber cloth or non-scratch sponge, rinse, and dry thoroughly. Work a small test spot first.
Avoid vinegar where coating, specialty-glass, or vehicle-manufacturer guidance prohibits acidic cleaners. When in doubt about the glass type or any coating, skip the acid.
Skip baking-soda paste, toothpaste, and similar abrasive household products. These can damage glass and are not worth the risk on a surface you want to keep clear.
When a gentle method does not remove the deposits, move to a dedicated remover rated for your glass and used exactly as labeled.
The GT Tools® PureGlass™ Water Spot Remover, $29.40, is built for this stage. It tackles stubborn mineral deposits, calcium, and other contaminants without scratching or dulling the glass, and leaves a residue-free, polished finish. GT Tools lists it for automotive windshields, windows, sunroofs, and architectural glass. The kit includes an 8 oz bottle of the remover compound and a non-marring nylon abrasive scouring pad, so the correct applicator comes with it.
Keep your controls in place: treat a small section at a time, use the supplied pad or another non-marring tool, protect adjacent materials, and wipe away residue and inspect before you repeat a pass. Follow the label rather than guessing at times or dilution.
Polishing is a controlled escalation for light remaining blemishes or haze after the deposits are gone. It is not the default for every water spot, and it does not cure deep etching.
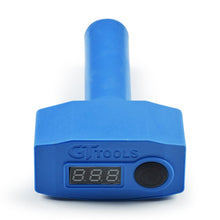
The Glass Polishing Kit, $51.50, is designed for blemishes that do not catch a fingernail. It includes half a pound of Diamond Fast Powder, a 5-inch felt pad, a 5-inch backing pad, and a spindle adapter, so it works with a power drill you already own. For best results run the drill at around 1500 RPM, though it can be applied by hand for smaller touch-ups.
The published procedure: clean the glass thoroughly, attach the backing pad to your drill with the spindle adapter, apply a small amount of powder to the felt pad, polish in gentle circular motions, and continue until blemishes visibly improve before wiping clean and inspecting.
Safety directions from the product page:
Wear eye protection during use.
Avoid polishing near glass edges or cracks.
Do not apply excessive pressure; let the pad and powder do the work.
Avoid contact with automotive paint or trim surfaces.
Do not ingest the polishing powder, and keep the kit away from children.
For household glass with heavier staining, the Diamond Clear Glass Renewal Treatment, $39.00, removes hard water stains and mineral deposits from shower doors and windows, including staining caused by exterior sprinkler systems. It removes light scratches as well, and includes a hydrophobic nano coating protectant providing months of crystal-clear protection. A power drill is required for operation.
Rinse or wipe the glass clean and dry it completely before you judge the result. Leftover slurry, cleaner, or water droplets hide the true condition and make you misread the outcome.
Reassess under angled light, comparing the treated area against an untreated one so you can see whether the deposits actually lifted or a mark remains fixed in the glass.
Hold to the stop rule. If cloudiness, pits, or damage stay unchanged after the surface deposits are gone, treat it as possible etching and move to professional assessment rather than increasing pressure.
Windshields. Put visibility first and protect adjacent paint, rubber, wipers, trim, and any coatings. Avoid aggressive abrasives. Stop if you see cracking, chips, optical distortion, or you are unsure about a coating. A windshield is a structural and safety part, so use a cautious approach.
Shower glass. Treat soap scum as pre-cleaning contamination and remove it before you assess the minerals. Dry the door after treatment. Because shower glass sees water constantly, prevention matters most here.
Household windows. Exterior sprinkler overspray is the common source. Protect frames, seals, and nearby finishes from cleaners and pads as you work.
There is no single acid, pad, or polishing method safe for all automotive, shower, and architectural glass. Match the method to the surface in front of you.
Step back from DIY work on etched, pitted, cracked, or edge-damaged glass, on coated or specialty glass, and any time a small spot test fails to improve the surface.
Replacement may be the safer outcome when the glass has structural damage, when visibility is affected, or when restoration cannot return usable clarity.
Restoration and replacement answer different problems. Mineral deposits and light surface blemishes often respond to cleaning and controlled polishing. Etching may respond to professional restoration. Structural damage points toward replacement. Knowing which one you have keeps you from applying the wrong fix.
Dry glass after water exposure. Reduce sprinkler contact with windows and vehicles. Remove fresh spotting promptly before it hardens. Follow the care directions for the surface and for any protectant you have applied.
The hydrophobic nano coating protectant included with the Diamond Clear Glass Renewal Treatment makes water bead and run off, which slows how fast minerals can settle, with months of protection per application.
No treatment prevents spotting forever. Treat maintenance as a recurring, low-effort routine sized to how much water your glass sees. A shower door needs more frequent attention than a sheltered window.
To recap: clean and test first, escalate to a glass-safe remover only when a gentle method fails, and polish only light remaining blemishes. Stop when you suspect etching, pitting, damage, or incompatible coatings.
Water carrying dissolved minerals, mainly calcium and magnesium, dries on the glass and leaves those minerals behind. The more often water dries on the surface without being wiped off, the faster the film builds.
It can lift light deposits on compatible, uncoated glass. A 50/50 vinegar-and-distilled-water mix, scrubbed gently with a microfiber cloth then rinsed and dried, is the common approach. Test a small area first, and avoid it on coated, specialty, or vehicle glass where the manufacturer prohibits acidic cleaners.
A dedicated glass-safe remover. The GT Tools PureGlass Water Spot Remover at $29.40 is formulated for stubborn mineral deposits and calcium on automotive and architectural glass without scratching or dulling, and ships with a non-marring pad.
The staged logic is the same, though products and risk levels differ. A windshield involves visibility, coatings, and structural safety, so verify any cleaner or pad is rated for automotive glass and stop at the first sign of cracking, chips, or coating damage.
If cloudiness or pitting remains after the glass is clean and dry, treat it as etching and stop escalating. Etching is damage in the glass, not a deposit on top of it, so harsher scrubbing will not remove it. Consider professional restoration.
Yes. Small removable glass items can soak in a 50/50 vinegar-and-water solution for several hours before rinsing thoroughly [2], since they can be fully submerged and given time for the acid to work. Do not extend soaking to installed or specialty glass without confirming compatibility.