

YOUR CART IS EMPTY
Go to cart
The practical difference between gel-style and liquid windshield repair resin is viscosity and flow. Thinner liquid resin is chosen when it must penetrate fine, narrow damage; thicker resin is chosen when controlled placement and reduced overflow matter more. In windshield crack repair, gel vs liquid resin is a decision driven by the manufacturer's specified break type and temperature range, not by treating the two labels as interchangeable. This guide walks through GT Tools' low-, medium-, and high-viscosity resins, the injector workflow each one needs, and the damage that calls for replacement instead.
Thicker or gel-style resin stays where you place it. It resists running out of the pit and gives you more control when the break is open and shallow. Liquid, low-viscosity resin flows readily and travels into narrow crack legs, which matters when the fracture is fine and tight.
Viscosity describes how easily a resin moves. A low-viscosity resin travels into narrow spaces more readily and reaches the tip of a fine crack leg. A high-viscosity resin needs more deliberate injection and gives you a slower, steadier fill you can watch as it enters the break.
Windshield repair resin is applied to mend and seal cracks, chips, and star-shaped fractures in laminated glass. The goal is to restore clearer vision and limit further spread of the damage. GT Tools describes its DiamondClear resins as an industry staple for over three decades, formulated for all climates and temperatures to produce a result that will last for the life of the windshield [1].
A repaired break can stay somewhat visible even after a successful repair. Resin repair seals the damage and limits spread; it does not return the glass to a factory-new appearance.
Caution: Do not substitute a thick resin for a low-viscosity resin, or the reverse, without checking the resin manufacturer's instructions for break type, temperature, and injector procedure. Two products that both look "thick" or "gel-like" can behave very differently.
GT Tools created the industry's first low acrylic acid resin compounds in 1995, to give the windshield repair industry a more user-friendly product [2]. The current lineup runs across four viscosities. All four are British Standards Institution tested.
DiamondClear™ LV is a low-viscosity, acrylic-acid-free resin with what GT Tools calls the perfect index match for glass. It is designed for star breaks, and can also be used in winter for all break types when colder temperatures slow repair times. It is formulated with the correct balance of UV inhibitors to prevent yellowing. Use in temperatures below 60°F, with a warming source for the windshield still recommended at those temperatures.
DiamondClear™ MV is the balanced middle of the range: medium viscosity for effective penetration into cracks with controlled application, and a refractive index that closely matches automotive glass. GT Tools lists it as suitable for bulls-eyes, star breaks, combination breaks, and short cracks. It is also the resin GT Tools directs you to when a radial crack is too long for HV. It ships with the resin bottle, an applicator tip, and a user instruction guide.
DiamondClear™ CR is a medium-to-low-viscosity, acrylic-acid-free crack repair resin with dynamic holding power and high tensile strength, and an excellent refractive index. It is designed for use in longer cracks and can also be used on stars with long cracks.
DiamondClear™ HV is a high-viscosity, acrylic-acid-free resin for hot weather, especially bulls-eyes and combination breaks, with an ideal temperature range above 85°F. It also conceals vinyl damage caused by severe impacts. Do not use HV when radial cracks exceed 1/2 inch; in those cases GT Tools directs you to DiamondClear™ MV instead.
GT Tools also lists dedicated pit filler resins, PF and PFAF, as separate products for the final pit fill.
Viscosity is only half the selection. LV and HV are each available in 15cc and 30cc bottles, and in Clear, Blue Green, Amber, and Grey tints. CR comes in 15cc and 30cc.
The tints are not cosmetic packaging. Per the product pages, the tinted resins offer a cured refractive index that more closely matches that of tinted glass in that specific color. If you repair a break in tinted glass with clear resin, the finished repair can read differently against the surrounding glass than a tint-matched fill would. Choose the tint to match the glass in front of you, then choose the bottle size against how fast your shop runs through resin. GT Tools groups the smaller bottles in a 15cc windshield repair resins collection.
Use this as a fast orientation, then confirm against the specific product page for the resin you are considering.
|
Property |
Gel / thicker, higher viscosity |
Liquid / thinner, lower viscosity |
What the technician should consider |
|---|---|---|---|
|
Behavior |
Stays where placed |
Flows and seeps |
Match viscosity to how tight the break is |
|
Break type |
Bulls-eyes and combination breaks (HV) |
Star breaks and fine cracks (LV) |
Follow the product's stated break type |
|
Penetration |
Slower travel into narrow legs |
Reaches fine legs more readily |
Thick resin may not reach the tip of a fine leg |
|
Injection |
More deliberate injection |
Enters readily under the cycle |
Follow the resin's specified vacuum and pressure sequence |
|
Temperature |
HV: above 85°F |
LV: below 60°F, with windshield warming |
Assess temperature before starting |
|
Cleanup |
Less overflow to remove |
More flow to manage |
Prepare for the resin's flow behavior |
|
Middle ground |
MV, medium viscosity: bulls-eyes, star breaks, combination breaks, and short cracks. CR, medium-to-low: longer cracks and stars with long legs. |
Most everyday work sits here rather than at either extreme |
|
|
Limits |
Radial cracks over 1/2 inch: use MV |
Extensive damage or driver's field of view: replace |
Follow product limits and your own safety judgment |
Is gel or liquid resin better for long cracks? Neither extreme. DiamondClear™ CR is the resin GT Tools designs for longer cracks, and it can also be used on stars with long cracks. Inspect the crack path first and decide whether resin can enter the break effectively along its full length. Do not assume a thicker resin will reach fine crack legs at the tip.
For a bulls-eye or combination break in hot weather above 85°F, HV is the intended choice. In moderate conditions, MV covers bulls-eyes, star breaks, combination breaks, and short cracks with balanced flow.
Read the damage rather than the broad label "chip." Look at the pit, the legs, and the internal fracture pattern to decide whether controlled placement or deeper penetration fits the break in front of you.
LV is designed for star breaks and can be used for all break types in winter, when colder temperatures slow repair times. Use it below 60°F and warm the windshield.
Assess temperature before you begin. The HV and LV operating ranges do not overlap, so a resin that suits an 85°F job is the wrong choice for a repair below 60°F.
Is the damage repairable at all? A widely used industry rule of thumb is chips smaller than a quarter and cracks shorter than six inches. Treat that as a starting guideline, not a standard; follow your own certification requirements, insurer rules, and the resin instructions.
Hot conditions above 85°F, bulls-eye or combination break? HV.
Fine star break, or a cold-weather repair below 60°F? LV, and warm the windshield.
Longer crack, or a star break with long legs? CR.
Radial crack longer than HV's 1/2-inch limit, or a mixed break in moderate conditions? MV.
Repairing tinted glass? Order the matching tint, not clear.
None of this overrides vehicle-specific safety requirements, technician judgment, or resin manufacturer instructions. For edge damage, weigh propagation risk and visibility. When the repair cannot be performed safely or effectively, move to a replacement assessment rather than forcing a fix.
Resin is one component of the repair. The rest of the setup decides whether it reaches the break:
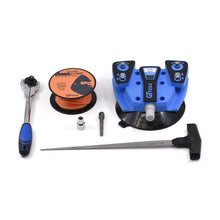
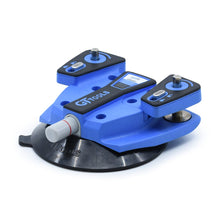
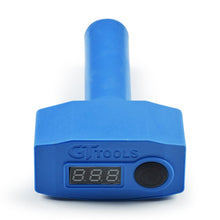
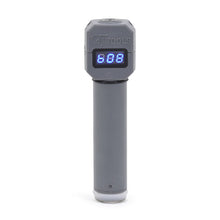
A bridge and injector holds position over the break and drives the vacuum and pressure stages.
A UV curing lamp, used according to the selected resin's cure instructions.
Cleaning and prep tools to prepare the damage before resin placement.
For long cracks specifically, long crack repair tools.
Choose a bridge and injector setup that seals over the break and holds manual control of the vacuum and pressure cycle. That control matters most with narrow crack legs or complex fracture patterns, where small adjustments decide whether the resin reaches the tip.
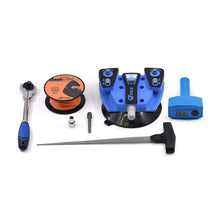
If you are building from scratch rather than adding to an existing bench, the windshield repair kits collection bundles the components. GT Tools describes its windshield repair equipment as designed, engineered, and field tested for a high volume, high output environment, made in Durango, Colorado, and backed by its Ironclad Warranty [3].
Inspect the damage type, crack length, location, visibility impact, and accessibility.
Decide whether repair is appropriate before preparing the glass.
Select resin viscosity and tint based on the break type, the glass, and the temperature.
Clean and prepare the repair area according to the kit and resin instructions.
Position the bridge and injector for a secure, centered seal.
Run the manufacturer's specified vacuum and pressure sequence to draw resin into the break.
Inspect the crack legs and break interior for incomplete fill before curing.
Cure with the specified curing light and exposure process for that resin.
Remove excess material and complete the finish steps, including pit fill where required.
Inspect optical appearance, remaining visible legs, and whether the damage has stabilized.
Step 7 is the one technicians skip under time pressure, and it is the one that decides the result. Once the resin is cured, an unfilled leg stays unfilled.
Repair resin is made for physical damage in the glass: chips, cracks, and star breaks. It is not the same category as a liquid glass coating, which is a protective surface treatment that adds scratch resistance and does not repair existing damage. Do not buy a protective coating expecting it to fix a crack.
Reject the repair and recommend replacement when:
The damage is extensive or spreads beyond what an injector can fill.
The damage sits in the driver's field of view, where a residual mark would obstruct vision.
No available resin matches the break type, temperature, and access conditions.
You cannot achieve a secure injector seal or maintain controlled application.
Follow the applicable vehicle, insurance, and safety requirements for your work.
For most everyday work in moderate conditions, MV covers bulls-eyes, star breaks, combination breaks, and short cracks. Move to HV above 85°F on bulls-eyes and combination breaks, to LV below 60°F or on fine star breaks, and to CR on longer cracks and stars with long legs.
No. Do not use DiamondClear™ HV when radial cracks exceed 1/2 inch. GT Tools directs you to DiamondClear™ MV in those cases.
Yes, on tinted glass. The Blue Green, Amber, and Grey resins offer a cured refractive index that more closely matches tinted glass in that specific color, so the finished repair reads more consistently against the surrounding glass. On clear glass, use clear.
Yes. LV is specified for use below 60°F and is designed to seep into the fine cracks that come with winter damage. Warm the windshield below 60°F, since cold slows repair times.
Yes. A thicker resin needs more deliberate injection and gives you a slower fill to watch, while a thinner resin enters more readily. Keep manual control of the vacuum and pressure cycle and follow the sequence specified for that resin.
No. A repaired break can remain slightly visible even when the repair is sound. The aim is to seal the break, limit spread, and improve vision through the area, not to restore factory-new appearance. Set that expectation with the customer before you start.
Confirm the damage is repairable. Identify the break type. Account for temperature, how far the resin has to travel, and whether the glass is tinted. Set up a bridge and injector you can control by hand. Then follow the chosen resin's instructions. When you are ready to pick a low-, medium-, or high-viscosity option, review the windshield repair resins collection.